
category
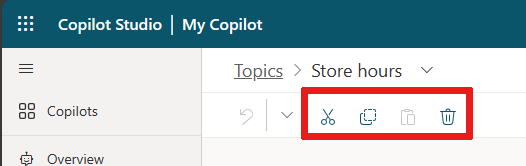
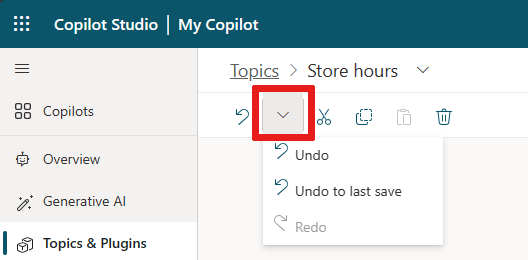
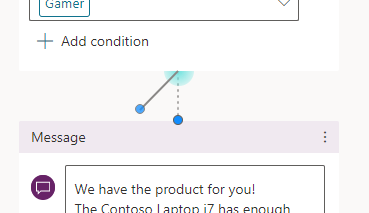
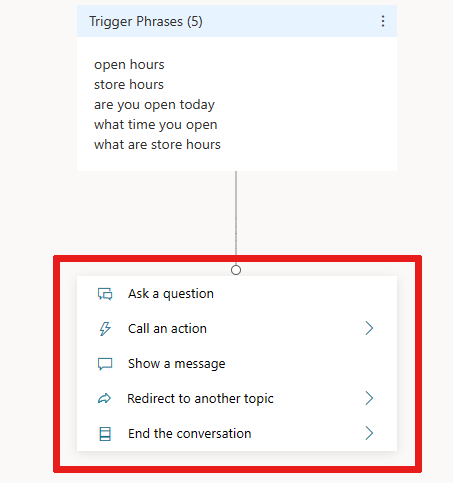
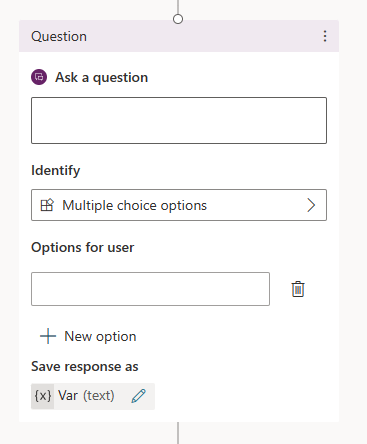
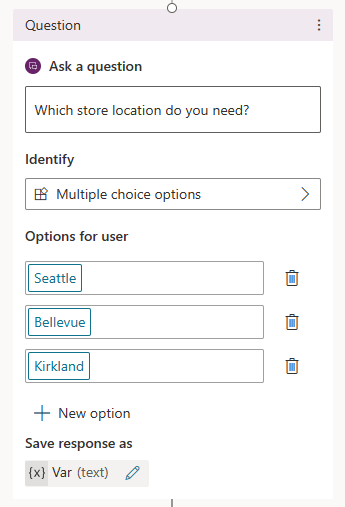
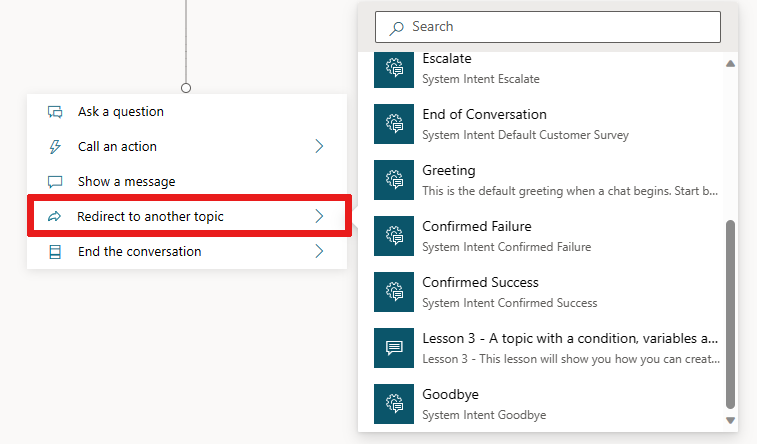
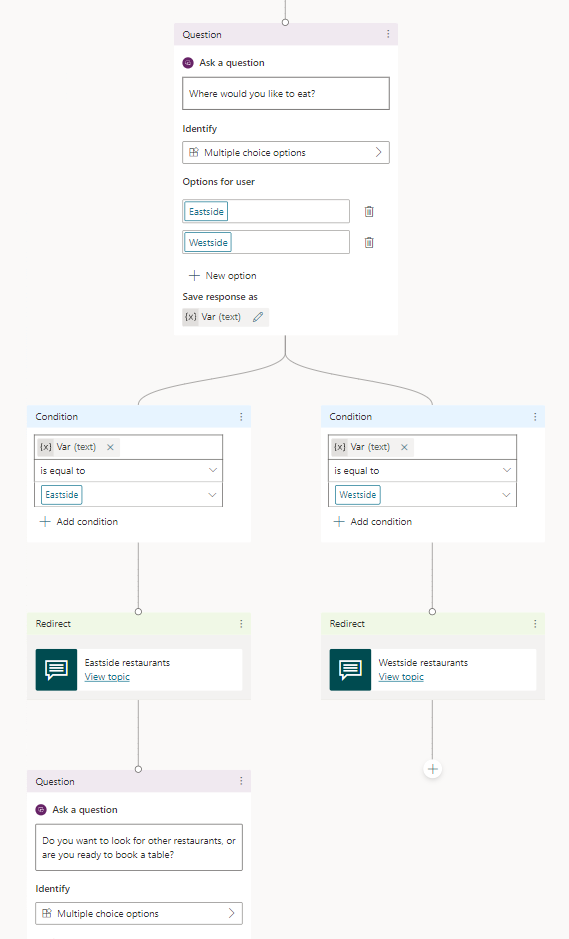
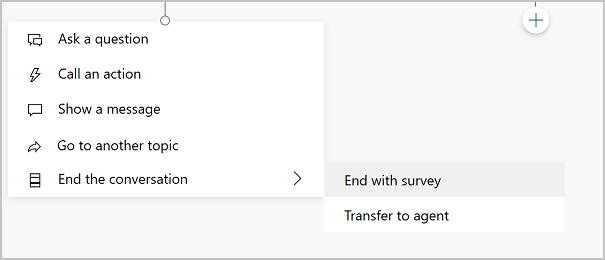
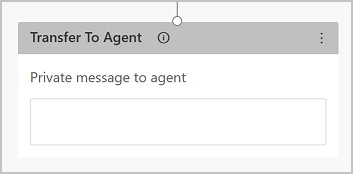
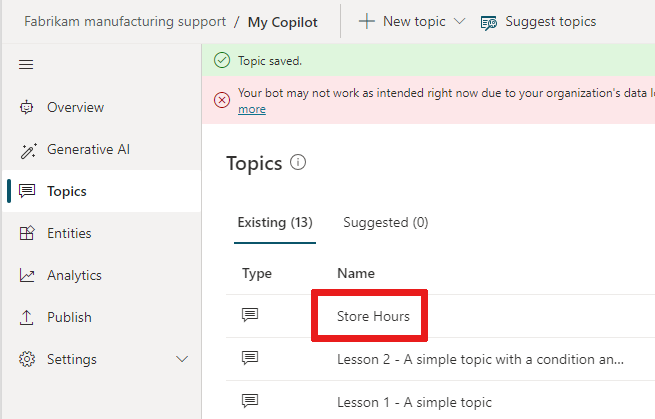
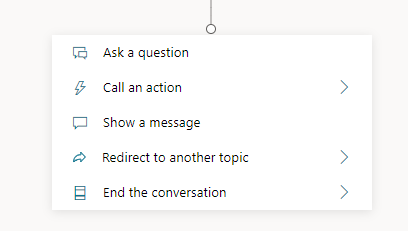
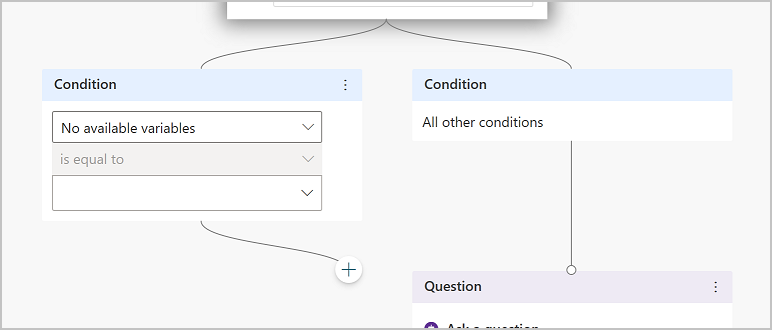
在Copilot Studio中,一个主题定义了副驾驶对话的进展方式。 要编写主题,您可以自定义提供的模板,从头开始创建主题,或者描述您想要的内容,并让AI为您创建主题。 在Copilot Studio中,主题代表用户和副驾驶之间对话线程的一部分。您可以在创作画布上定义和使用主题。一个主题包含一个或多个会话节点,这些节点共同定义了一个主题可以采取的会话路径。每个节点执行一个动作,例如发送消息或提问。 通常,一个主题有一组触发短语——短语、关键字和客户可能会使用的与特定问题相关的问题。Copilot Studio副驾驶使用自然语言理解、客户信息和所有主题的触发短语来找到最佳的触发主题。消息不需要完全匹配主题的触发短语来触发主题。例如,关于商店营业时间的主题可能包括触发短语检查商店营业时间。如果客户输入“查看商店营业时间”,则此短语会触发您的商店营业时间主题。 A copilot uses natural language understanding (NLU) to parse what a customer typed and find the best trigger phrase or node. For example, a user might type "Open hours." The copilot matches that to the Store hours topic, begins a conversation that asks which store the customer is interested in, and then displays the hours the store is open. The Test copilot pane shows how the copilot conversation progresses at every step. You can use the Test copilot pane to fine-tune a topic without having to exit the Copilot Studio portal. For copilot and topic limits, see Quotas, limits, app registration, certificates, and configuration values. 副驾驶可以包括两种类型的主题,系统主题和自定义主题。每个新副驾驶都从一组预定义的系统和自定义主题开始。 The following types of node are available: Tip Rename nodes to make them easier to identify. Select the node's name field to update the name directly, or select the More icon (…) of the node and select Rename from the menu. You can also rename nodes in the code editor. The Trigger node and Go to step nodes can't be renamed. Node names can be up to 500 characters in length. Save the topic containing the renamed nodes to save the renamed nodes to the project. Open your copilot from the list on the Copilots page. For better visibility, close the Test your copilot panel for now. On the top menu bar, select Topics. Select Add a topic, and select From blank. A Trigger node appears on an otherwise blank topic authoring canvas. Select the More icon (…) of the Trigger node, and then select Properties. The On Recognized Intent properties panel appears. In the On Recognized Intent properties panel, select the Phrases area. The Phrases secondary panel appears. Under Add phrases, enter a trigger phrase for your topic. Your copilot needs 5 to 10 trigger phrases to train the AI to understand your customers' responses. To add more trigger phrases, you can either: You can include punctuation in a trigger phrase, but it's best to use short phrases rather than long sentences. Select Details on the toolbar to open the Topic details panel. Add your copilot topic details: Select Save on the top menu bar to save your topic. Important Avoid using periods ( When you create a topic, a Trigger node automatically appears on the authoring canvas. You can then add different types of nodes to achieve the desired conversation path for your topic. To add a node after another node or between two nodes on your topic authoring canvas: Select the Add node icon Select the desired node type from the list that appears. Select the menu icon (⋮) of the node you want to delete, and then select Delete. You can use controls on the toolbar to cut, copy, paste, and delete the selected node or selected adjacent nodes. The toolbar also has a control to undo an edit. Open the Undo menu to revert all actions back to the last save or to redo the previous action. Once you use the Cut or Copy tools to place one or more nodes on the clipboard, there are two ways to paste them in the canvas: If you select a node and then select Paste, the nodes on the clipboard are inserted after the selected node. If you select the "+" to see the Add node menu, then select Paste, the node on the clipboard is inserted at that location. Topics can have input and output parameters. When a topic redirects to another topic, you can use these parameters to pass information between the topics. Additionally, if your copilot uses generative mode, it can automatically fill topic inputs from the conversation context, or after generating questions to gather values from users. This behavior is similar to how generative slot filling works for actions. To learn more about input and output parameters for topics, see Manage topic inputs and outputs. The code editor shows the topic in YAML, a markup language that's easy to read and understand. Use the code editor to copy and paste topics from other bots—even ones created by other authors. Important Designing a topic entirely in the code editor and pasting complex topics isn't fully supported. In this example, you copy and paste YAML into the code editor to quickly add a topic that asks the customer for shipping information. On the Topics page, select + Create > From blank. In the upper-right corner of the authoring canvas, select the Select and delete the contents of the code editor. Then copy and paste the following YAML code: Select Save, and then select Close code editor. The Question node now has many conditions to the question about shipping. Test your copilot when you make changes to your topics, to make sure everything works as expected. After you design and test your copilot, publish it to the web, mobile or native apps, or Microsoft Bot Framework channels. When you create a bot, several topics are created for you. 这些自动创建的主题分为两类: From the navigation menu, select Topics, then + New topic, then From blank. The Trigger phrases pane opens. Add several trigger phrases for your topic in the Add phrases section. You can specify more than one trigger phrase for a topic, using a new line for each phrase. You can include punctuation in a trigger phrase, but it's best to use short phrases rather than long sentences. In the top bar, edit the title of your topic to give it a name. Press Enter or select the Save icon to save your changes. Select the Details icon. Here you can alternatively edit the Name and add a Display name and Description. The Display name tells the bot which topic the person is asking about. The Description describes the purpose of the topic for yourself and other bot makers. This description isn't shown to users. Select Save to add the topic to the topics list. In the topic list, select the topic you want to edit. You see the topic's trigger phrases. Here you define the conversation path between a customer and the copilot. For existing or system topics, several nodes are created automatically. You can edit these nodes just as you would edit other nodes. When you create a new topic, a Trigger node and a blank Message node are inserted for you. To add a node, select "+", Add node, located between or after nodes. To change the paths between nodes, drag the small circle on top of the node—its node anchor—to a new location in the canvas. The dotted line represents the original path. When you add a node after the Trigger Phrases node or between Message nodes, you can: Select the Ask a question option of the "+" Add node menu to add a new Question node. A question node appears. Enter the question phrase in the Ask a question field. For example, if the user wants to know store hours, the bot's question might be Which store location do you need? Under Identify, select an option for the user's response, such as Multiple choice options. This option determines what the bot should listen for when the user responds. For more information, see Use entities in a conversation. Under Options for user, enter expected responses to the bot's question. For example, if you chose Multiple choice options in Identify, the options might include store locations such as Seattle, Bellevue, or Kirkland. Each choice is presented to the user as a multiple choice button in the chat, but users can also type their answer. (Optional) Save the user response in a variable to be used later. The conversation editor creates separate paths in the conversation depending on the customer's response. The conversation path leads the customer to the appropriate resolution for each response. You can add nodes to create branching logic, and specify what the bot should respond with for each path or variable. To call Power Automate flows and insert authentication nodes, select Call an action from the "+" Add node menu. If voice-based capabilities are enabled for your bot, you see more actions. To specify a response from the bot, select the "+" Add node to add a node, and then select Show a message to add a new Message node. Enter the message you want the bot to say in the text box. You can apply some basic formatting, such as bold, italics, ordered and unordered lists, and hyperlinks. You can also use variables that you define elsewhere in your bot conversation. To have the bot move to a different topic, select the "+" Add node to add a node, and then select Redirect to another topic. A list of topics appears. Select the topic the bot should divert to. For example, you might send the user to a topic about the closure of a store if they ask about the store's hours. The redirected topic is a subtopic. You can insert more nodes under the subtopic's node. When the conversation path for the subtopic is finished, the bot returns to the original topic. The bot then follows the nodes that are under the subtopic's node. If you redirect to any of these system topics, however, the entire conversation ends. When the conversation ends, you can have a survey ask users if their question or issue was answered or resolved. The response is collected on the customer satisfaction analytics page. You can also have the conversation handed over to a live agent if you're using a suitable customer service portal, such as Omnichannel for Customer Service. At the end of a response that resolves the user's issue or answers the question, add an End the conversation node. To end with a customer satisfaction survey, select End with survey. To insert a handoff node that links with your configured handoff product, select Transfer to agent. (Optional) Enter a private message to the agent. To add branching logic based on variables, select the "+" Add node to add a node. Select Add a condition. Select Branch based on a condition. Select the variable that determines whether the bot conversation should branch at this point. For example, if you set up user authentication, you might want a different message if the user is signed in. Select the menu icon (⋮) of the node you want to delete, and then select Delete. Test your copilot when you make changes to your topics to ensure everything works as expected. After you design and test your bot, publish it to the web, mobile or native apps, or Microsoft Bot Framework channels. In the topic list of your copilot, select the topic you want to edit. For example, you might want to edit the topic Store Hours. Once open, you see the topic's trigger phrases. This authoring canvas is where you define the conversation path between a customer and the bot. When you create a new topic, a Trigger Phrases node and a blank Message node are inserted for you. For existing or system topics, several nodes are automatically created with each new topic. You can edit these nodes if needed. You can add more nodes by selecting "+" Add node between nodes or after a node. To change the paths between nodes, drag the node anchor—a small circle on top of the node. You see a dotted line indicating the original path. When adding a node to a trigger phrases node, choose from five different options: If you want to redirect a topic, you can go to another topic. Select the Ask a question option of the "+" Add node menu to add a new Question node. A question node appears. Enter the question phrase in the Ask a question field. For example, if the user wants to know store hours, the bot's question might be Which store location do you need? Under Identify, select an option for the user's response, such as Multiple choice options. This option determines what the bot should listen for when the user responds. For more information, see Use entities in a conversation. Under Options for user, enter expected responses to the bot's question. For example, if you chose Multiple choice options in Identify, the options might include store locations such as Seattle, Bellevue, or Kirkland. Each choice is presented to the user as a multiple choice button in the chat, but users can also type their answer. (Optional) Save the user response in a variable to be used later. The conversation editor creates separate paths in the conversation depending on the customer's response. The conversation path leads the customer to the appropriate resolution for each response. You can add nodes to create branching logic, and specify what the bot should respond with for each path or value. On some node types, you can add a condition. To add branching logic based on variables, select the "+" Add node menu, then select Add a condition to add a new node. A couple of condition nodes appear. Choose the variable you want to use to determine if the bot conversation should branch at this point. You can call Power Automate flows by selecting Call an action in the "+" Add node menu. A message can specify a response from your bot to the user. Select the "+" Add node menu, then select Show a message to add a new Message node. Enter what you want the bot to say in the text box. You can apply some basic formatting, such as bold, italics, ordered and unordered lists, and hyperlinks. You can also use variables that you defined elsewhere in your bot conversation. You can choose to End the conversation as a final node to your bot's conversation. There are two options: End with survey shows a survey that asks the user if their question or issue was answered or resolved correctly. This information is collected under the customer satisfaction analytics page. Transfer to agent allows you to type a private message to an agent that initiates their contact with the user. To automatically have the bot move to a separate topic, select Add node (+) to add a node, and then Redirect to another topic. In the flyout menu, select the topic the bot should divert to. For example, you might want to send the user to a specific topic about the closure of a store if they ask about store hours for that store. When the bot goes to another topic, the bot goes through the conversation path for that topic and then returns to the original topic—the place where it left. You can consider the redirected topic as a subtopic. If you redirect to any of the following system topics, however, the entire conversation ends: You can use variables that you defined elsewhere in your bot conversation. Select the menu icon (⋮) of the node you want to delete, and then select Delete. After you make changes to your topics, Test your copilot to ensure everything is working as expected. Once you finish designing and testing your bot, you can publish it, so other team members can use it.
Prerequisites
Natural language understanding
Topics in Copilot Studio
Web App
Topic types
Node types
Option
Description
Send a message
Send the customer a message.
Ask a question
Ask the customer a question.
Ask with adaptive card
Create a JSON snippet to exchange with other apps.
Author using conditions
Branch your conversation based on a condition.
Variable management
Set a value, parse a value, or clear all variables.
Manage topics
Redirect, transfer, or end the topic or conversation.
Call a flow
Call a flow like Power Automate or Excel Online, or use a connector or a plugin.
Advanced
Generative answers, HTTP requests, events, and more.
Create a topic
![]() next to the text field, and enter the desired phrase.
next to the text field, and enter the desired phrase.
.) in your topic names. It isn't possible to export a solution that contains a copilot with periods in the name of any of its topics.Design a topic conversation path
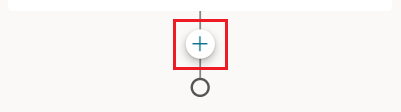
![]() below the node under which you want to add a new node.
below the node under which you want to add a new node.
Delete a node
Controls for editing nodes on the canvas
Paste nodes
Add input and output parameters for a topic
Edit topics with the code editor
... to see More options, then select Open code editor.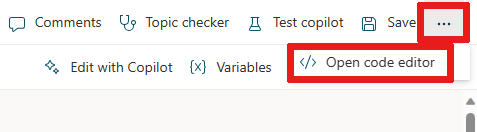
kind: AdaptiveDialog
beginDialog:
  kind: OnRecognizedIntent
  id: main
  intent:
    displayName: Lesson 3 - A topic with a condition, variables and a prebuilt entity
    triggerQueries:
      - Buy items
      - Buy online
      - Buy product
      - Purchase item
      - Order product

  actions:
    - kind: SendMessage
      id: Sjghab
      message: I am happy to help you place your order.

    - kind: Question
      id: eRH3BJ
      alwaysPrompt: false
      variable: init:Topic.State
      prompt: To what state will you be shipping?
      entity: StatePrebuiltEntity

    - kind: ConditionGroup
      id: sEzulE
      conditions:
        - id: pbR5LO
          condition: =Topic.State = "California" || Topic.State = "Washington" || Topic.State     = "Oregon"

      elseActions:
        - kind: SendMessage
          id: X7BFUC
          message: There will be an additional shipping charge of $27.50.

        - kind: Question
          id: 6lyBi8
          alwaysPrompt: false
          variable: init:Topic.ShippingRateAccepted
          prompt: Is that acceptable?
          entity: BooleanPrebuiltEntity

        - kind: ConditionGroup
          id: 9BR57P
          conditions:
            - id: BW47C4
              condition: =Topic.ShippingRateAccepted = true

          elseActions:
            - kind: SendMessage
              id: LMwySU
              message: Thank you and please come again.

Test and publish your copilot
Classic
Use system and sample topics

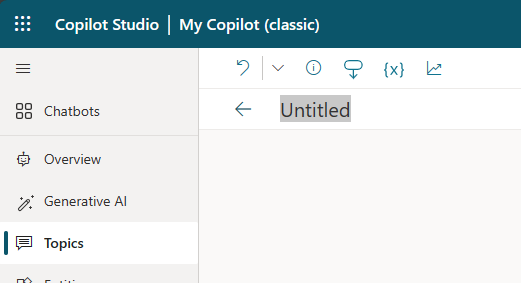
Create a topic


Design the topic's conversation path
Insert nodes
Ask a question
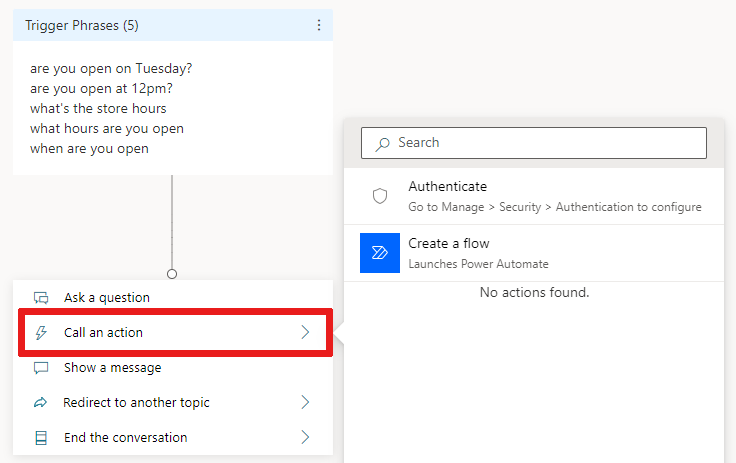
Call an action
Show a message
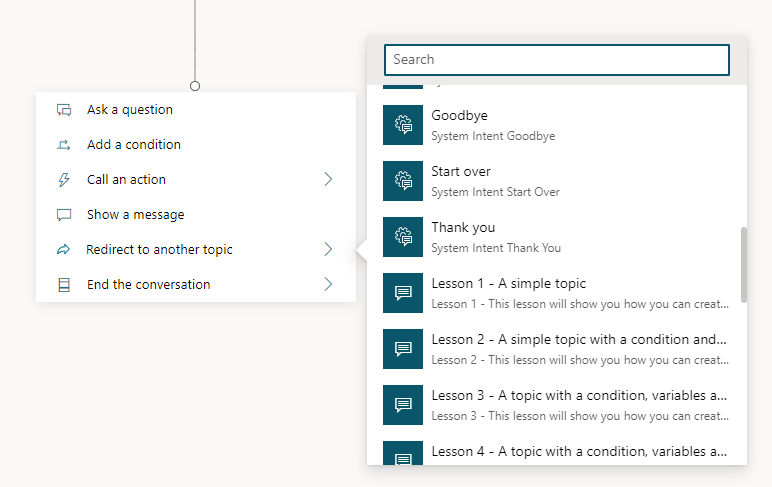
Redirect to another topic
End the conversation
Add a condition
Delete nodes
Test and publish your bot
Teams
Design the topic's conversation path - Teams

Insert nodes - Teams
Ask a question - Teams
Add a condition - Teams
Call an action - Teams
Show a message - Teams
End the conversation - Teams

Redirect to another topic - Teams

Use variables
Delete nodes - Teams
Test and publish your bot - Teams
- 登录 发表评论
- 59 次浏览
最新内容
- 1 week ago
- 1 week 4 days ago
- 1 month 4 weeks ago
- 5 months 3 weeks ago
- 5 months 3 weeks ago
- 5 months 3 weeks ago
- 5 months 3 weeks ago
- 5 months 3 weeks ago
- 5 months 3 weeks ago
- 5 months 3 weeks ago